Saturday, 23 February 2013

SPOON # 8 - 23rd February

I haven't got an awful lot of wood at the moment, and what I do have is fast seasoning and drying out in the back garden, making it increasingly difficult to carve and will soon be good for nothing but the woodburner. So, I thought I'd have a go at making the most of it by carving my biggest spoon so far this year.

For big stirers


I rather like carved items that have the tool marks left on, rather than sanded off -
 though I do sand sometimes, especially if it's an eating spoon and potentially going in someone's mouth.

I used a section of ash that I split a couple of weeks ago and decided to make a spoon that was pretty much as long as the log had been, leaving just a little to cut off either end, to allow for any checking (the end section of wood that had been most exposed to the elements since being originally cut and which was therefore the most dried and cracked - if you allow any of this wood to make up part of your spoon, it WILL crack and split - a lesson I have learned the hard way). I haven't actually measured the spoon, but I have taken a photo with it beside a regular dessert spoon for comparision.

With it being so big, naturally it is a cooking spoon, for stiring sauces, pasta, cous cous, etc. The bowl has that point that means it will reach well into the corners of square-bottomed saucepans. And again I have chosen not to crank the bowl and handle, as it will be used more for stiring than serving. For this reason also I intended to make the bowl fairly shallow, but got carried away smoothing and ended up quite deep anyway. I would really like to get myself a new hooked knife at some point. This is the knife I use for carving out the bowl - if you haven't seen one before, they look like this:

Frosts hooked spoon knife - ole faithful


a very simple idea, but really very ingenious. Anyway, because of the tight radius of the blade on my knife, it means it will take fairly deep, but narrow cuts. What I would like is a blade that is more 'open', sometimes called a finishing knife, or even a twca cam (Welsh spoon knife) that would mean I can cut the length of the bowl in one, smoother cut.

Twca cam - see how long the handle is and how broad the sweep of the blade compared to the bowl of the spoon. This is the one recommended by Barn 'the spoon' Carder - price around £65, if I remember rightly.
A selection of hooked knives - second from right is the Frosts and you can see how much tighter the curve of the blade is compared to the finishing knives on the left.
Again, it's a fairly simple non-decorative finish, but I have carved the end of the handle in what I call a 'biscuit finish' - I call it this because I think the regular notches look a little like a Nice biscuit.


Everybody likes to dunk a Nice - it's so nice!!
Came across this rather 'Nice' chopping board online - available at squarepear.
It still has a couple of weeks drying out and I will oil it with walnut oil (my non-toxic oil of choice) and I imagine, once it has been used and washed a few times, it will develop quite an attractive petina.

Sunday, 17 February 2013

SPOON # 7 - Sunday 17th February

I was hoping I wouldn't have to do this, certainly not so early on in the project, but here I have, for your entertainment, a spoon of convenience. Having been away at EuroDisney for best part of the week, I haven't had time to make a new spoon, and so have had to go to the fire wood where I had discarded this particular spoon as a reject. I have finished it off and it doesn't look too bad, so why did I discard it in the first place?


I think it is actually a very nice shape, following the natural curve of the wood.


Well, it is a willow spoon, carved from a crook, or bent branch. Spoons made in this way are supposed to be preferable as the spoon follows the natural contours of the wood, so giving the spoon extra strength (though, unless you're planning to use your spoon as a tyre iron I'm not sure that using straight wood would mean your spoon being unservicably weak). I have not had much experience of crooks and was quite pleased with this one, until, as is so often the case, I discovered that the crook concealed a knot - the dirty great brown blob you can see in the centre of the bowl. I was so cross as I don't have the time or resources to carve pretty much a whole spoon, only to throw it away, and when the knot actually fell out, leaving a big hole, I knew I had no alternative.

However, as I had to post a spoon, and with necessity being the mother of invention (or botch jobs) I glued the knot back in and completed the spoon. As you can see, I have left it tooled and given it a slight up-sweep at the tip of the handle. Not my finest or proudest moment, but not a bad spoon in the end.

Saturday, 9 February 2013

SPOON # 6 - Saturday 9th February


Spoon number 6 is an ash dessert spoon. Despite the fact that I prefer cranked spoons, this is the second in a row that I've made which is straight. That’s not to say I don’t like straight spoons. There are some carvers out there who make some lovely ones – I follow Simon Hill on his blog: http://simonhillgreenwoodwork.blogspot.co.uk/
He has made some lovely straight spoons lately, highly decorative and beautifully finished. Have a look – his spoons are for sale and well worth the price, I think.


Mine is a fairly simple spoon, but I have carved the end in what I have come to call ‘Jarrod-style’. Jarrod Stonedahl is one of my all-time favourite spoon carvers. He makes very delicate, often painted, practical yet decorative spoons, many of which seem to utilize a similar technique on the end-of-the-handle carving. It is simple, but to my eyes, very effective and quite Victorian looking. Just have a look at Jarrod's spoon rack - brilliant!

 
I did see Jarrod at Spoonfest but didn’t actually get to do his class, so have kind of worked it out by looking at a spoon that my brother Julian bought of his, as well as pictures from his website. It simply entails carving notches (straight-sided ‘v’ cuts) and cornices (curved cuts) in the edge profile of the stem or handle. Then a long 45 degree cut is made on the top edge of the handle, in effect chamfering it. This has the effect of adding an extra dimension to the décor, something which I think is really elegant.


Have a look at this spoon of Jarrods and you’ll see what I mean:


I particularly like the white spoon - it looks so 'authentic' and could easily have been made a hundred or so years ago.
 
Jarrod also sells his spoons and if you can get hold of one, I would highly recommend them. Julian eats his breakfast with one every morning and it holds up to regular use really well.

Sunday, 3 February 2013

SPOON # 5 - 3rd February

When I first began carving spoons, often sat around a camp fire, whittling away the evening, I was quite interested in the decorative aspect of what I was carving - patterns, twists, lettering,etc. As I carved more, the actual form of the spoon became more important as well as functionality, whilst decoration took something of a back seat. So for this week's spoon I thought I'd have a go at someting a little more decorative.

Again it's an ash spoon, though carving on this one was not so easy as I'd split it a couple of weeks ago and it had been indoors, where it had dried out a little more than I would have liked. It has what I call a reversed bowl - imagining the bowl as an egg shape, on modern spoons it is conventional for the thick end to be nearest the stem of the handle, with the narrower, pointed end being at the tip. A reversed bowl is just that, where the thick end is at the tip and the pointed end at the handle. I've left on the tool marks and, unusually for me, not crancked the handle at all.


The design on the handle is a very simplified celtic twist. One of my favourite Saturday activities is to sit in front of the Six Nations Rugby and carve a spoon or kuksa on my little portable stump in the sitting room. My wife is very indulgent of my hobbies and allows me to carve in the house as the sitting room floor is wooden and I can sweep my shavings straight into the wood burner. So I thought I'd carve this spoon in comemoration of the opening game between Ireland and Wales which I was watching while I carved it.

It still needs further drying, then oiling, and I am hoping I might get a little colour or darkening in the lower carved sections, and this should show off the relief even further. I have a really nice set of Flexcut palm chisels somewhere, but I suspect they are either in my garage or shed, which are both still in 'winter-mode' - meaning we have simply thrown everything in there over the winter, just to get things out of the way, and they both need a good spring cleaning, which I hope will uncover the chisels. If I'd got them to hand I think I would have done a little more carving on the twist to highlight the shape of the bands. Maybe once the spoon is completely dried out and I've finally found the chisels.

Friday, 25 January 2013

SPOON # 4 - 25th January

Firstly, I thought I should include a picture to demonstrate my dedication to spoon carving. So, when everyone else, including my family, were wrapped up warm beside the fire during last week's snow storms, I was out in the garden roughing out spoon blanks - namely the spoon below.


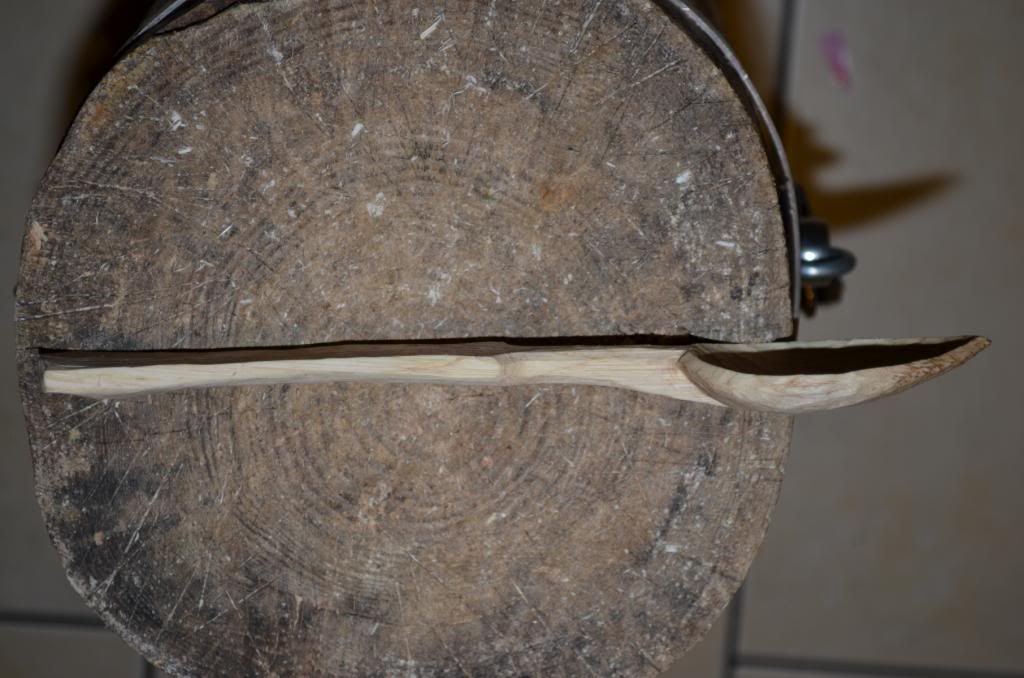
This week's spoon is one of my all time favourites so far. There's just something about it that ticks (nearly) all the boxes for me. I like the proportions; I like the overall shape; I like the bevel on the bowl rim; I don't mind the carving on the handle. I particularly like how heavily cranked it is - by this I mean the curve from tip of handle, down along the stem, and through the bowl to the tip of the bowl. You can see it quite clearly on the side view. I just like spoons that are cranked, and this one is about at the limit you can achieve before turning it into a laddle, or making it impractical to use.


The only thing I don't like so much about it? Well, again, it's ash and so very blonde. That's not such a bad thing in and of itself, but for my personal tastes, I like wood with a little colour, just a blush of darkness perhaps. I'm kind of hoping it might colour up a bit with age and oiling - this one's not fully dried out and so won't take on oil properly yet. I'd thought I might like to paint it, if I had the right paint. I still might some time in the future.I think that would make the carving on the handle stand out more - you can barely see it on thses photos.

It's tiny, I know. My intention was to make one that can just slip in my pocket - a replacement for one I'd made previously but that got broken. One that I can take hiking and camping and backpacking and that won't take up too much space.

Couldn't find an egg cup so used one of my turned trinket boxes, sans lid


I thought it would be ideal for eating boiled egg, hence the pictures. I'm a fairly good cook, but I really do struggle with achieving a boiled egg with a soft yolk. Poached eggs? No problem - got my system down to a tee: once the water is boiling, crack in the egg, push down the toaster; once the toast pops, the egg's ready to come out - perfect semi runny yolk. Oh well, I guess I'll just have to practice.

Friday, 18 January 2013

SPOON # 3 - 18th Jan

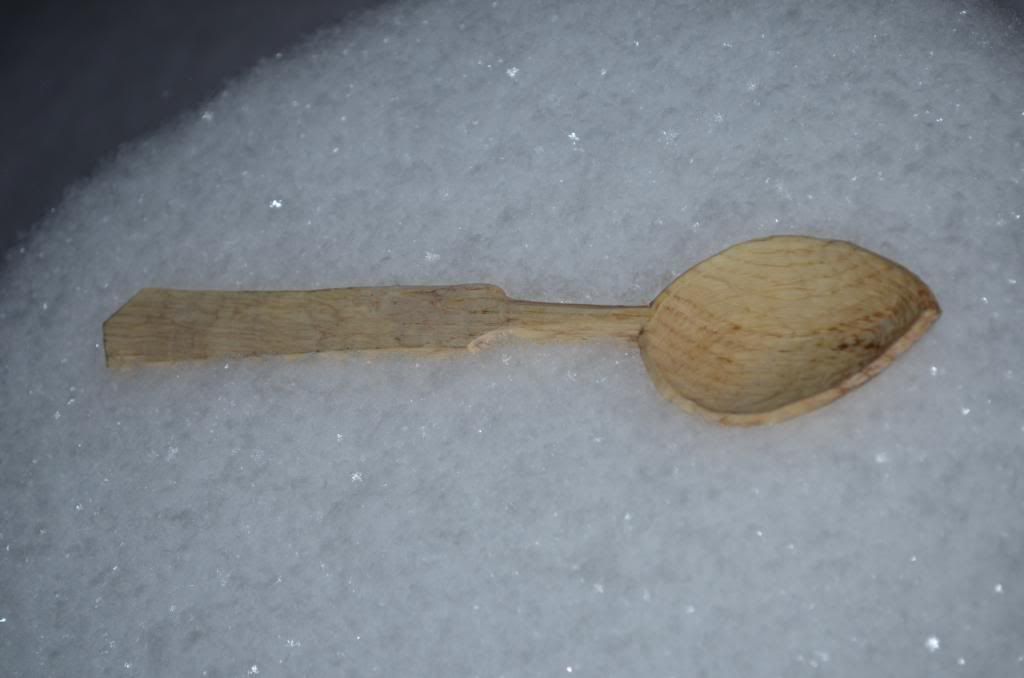
Another ash spoon, again in what I consider to be something of a traditional or even medieval style. I've seen other spoons of this kind on the internet and quite like the simplicity of the overall design, contrasted with the unnecessarily ornate 'spade' shape of the bowl.

Not a great picture, I know, but I had to make the most of the snow -
 it doesn't last for long here in the UK.

The strange brown discoloration at the tip of the bowl is actually in the grain
of the wood and adds a bit of character, I think.


I'm not sure you can see it very well on the photo, but I have left a small swell
on the underside at the end of the handle, which makes it a little nicer in the hand - tactile too.

Again, as it's a 'working' spoon - it's about the size of an average serving spoon - I have left it with a tooled finish. The bowl is fairly shallow and I really quite like the chamfered edge on the bowl.

I haven't used the spoon yet, it needs a few more weeks of drying really, and a further oiling, but I imagine it would work very well. Although the pointed tip of the bowl could prove to be a double edged sword - great for getting into the corners of pots, pans and jars; maybe a weak point that could break off with use.

Saturday, 12 January 2013

SPOON # 2 - 12th Jan

Since this is the beginning of my journey through spoon carving, I thought I would begin with something traditional, utilitarian, every-day and that would be familiar to everyone - a kitchen spoon - what most people would be refering to when they talk about a wooden spoon.

I wanted to make something a little more interesting than your regular Wilkinsons wooden spoon so got onto the net and looked at images of medieval spoons. There are surprisingly many examples of medieval spoon styles - obviously most of those that survive are metal and a little more high-end than your average kitchen spoon, but there are some examples from ship wrecks, where the ocean bed has preserved the wood.

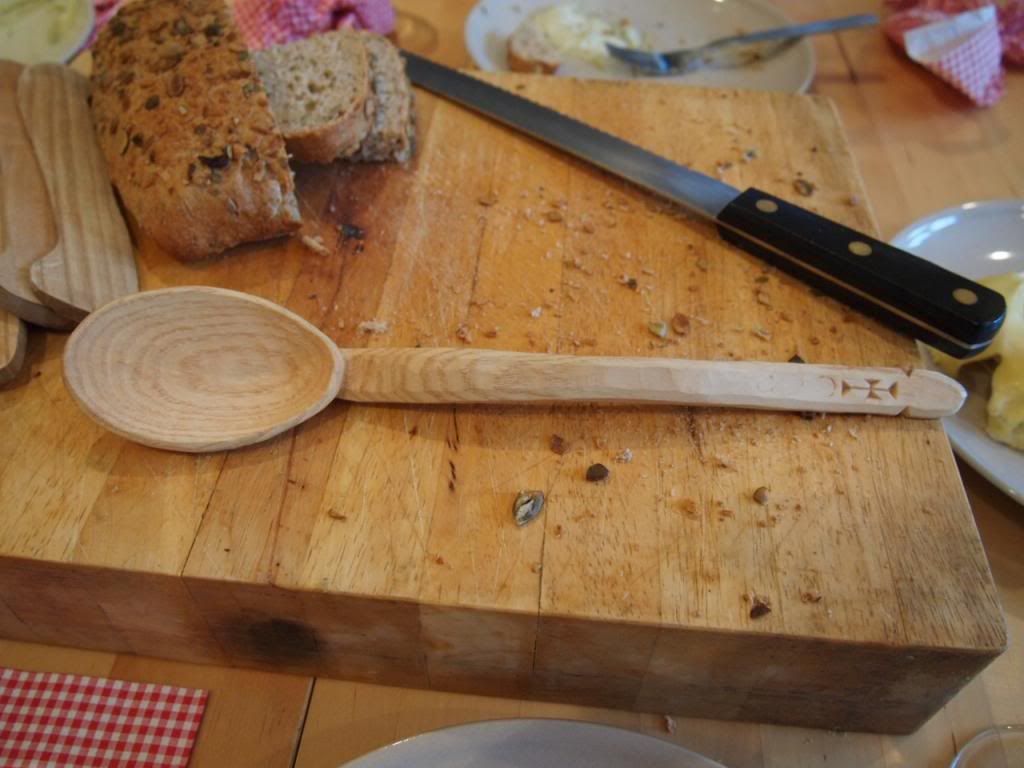
Anyway, the one I chose to make is not so much authentic medieval in design (or at least not to my certain knowledge - I'd love to hear about it if anyone knows otherwise) but it's a design I like. I have seen similar spoons made by other spoon carvers, most recently by the very talented Jon Mac on his blog. His are beautiful and done with more care and experience than mine. It's a design I have come to call 'floating bowl', for obvious reasons and mine is made from another fairly seasoned piece of ash which I reclaimed from my log pile as I feel quite protective about ash now and wouldn't want to simply burn it if I could use it for something more practical. Here it is - please ignore the mess in the background, leftovers from last night's supper party.


Originally I carved the word COOK into the handle but thought it looked wrong
so carved it back off - you can just see the trace of an O beneath the cross

As it was going to be a working spoon I purposely left the tool markes and didn't
sand. I think this adds interesting detail and evidence of the handmade nature of the spoon.

There has been some discussion over the past couple of weeks on Jarrod Stonedhal's blog about actually using the spoons that we make and our families' attitudes to them. Have a look here:

http://jarrodstonedahl.blogspot.co.uk/

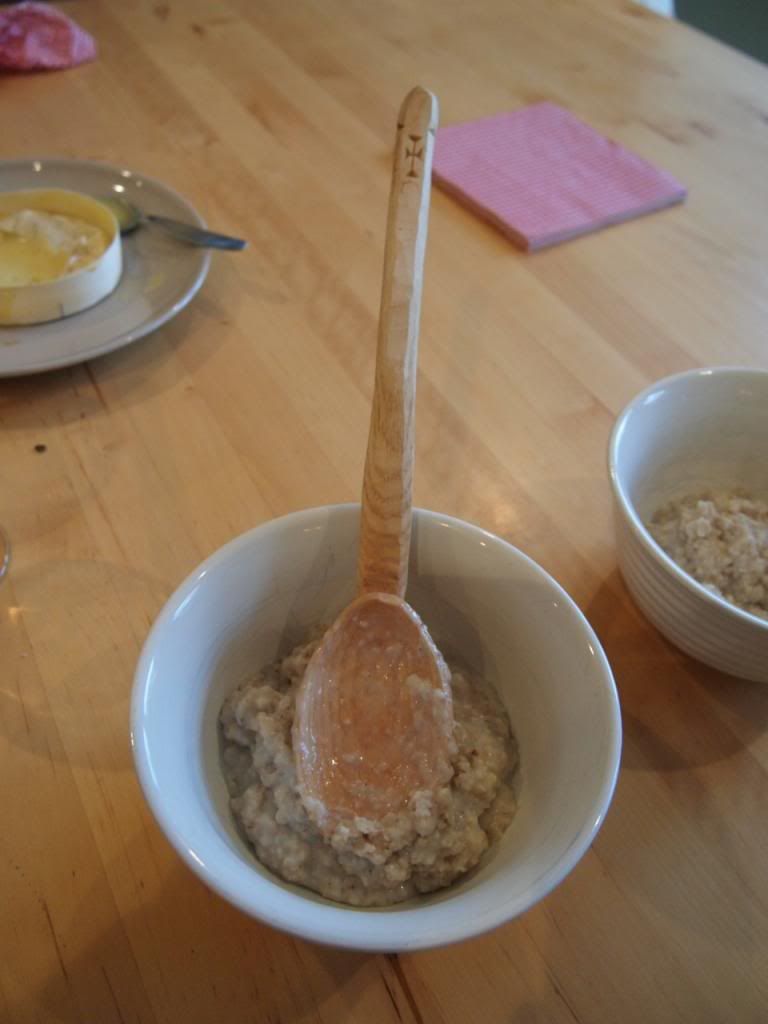
I think I have confessed before to the fact that, despite having been carving spoons for best part of a couple of years now, I haven't personally actually used any of my own spoons, either for cooking or eating. I decided to remedy that this morning by using this spoon to make porridge. It worked very well (as you might expect from a spoon).


I've always liked porridge, though the porridge I eat today is oddly different in texture from that my mum used to make for me. I use my wife's recipe which is quite simply oats, water and milk in a ratio of 1:1:1. I like to add golden syrup when I eat mine - sorry to any Scotish fundamentalists who think it should only be salted - but had none today so used maple syrup instead. And speaking of porridge, whilst I appreciate that it's not technically a spoon, I thought I might have a go at making one of the fiftytwo a spurtle.

So that's spoon number two. I might not make it to spoon number three as my wife has just looked over my shoulder and is horrified that I used photos that include last night's washing up. I thought it gave the pictures an interesting background - she doesn't. Oh well, it was nice knowing you!