
 |
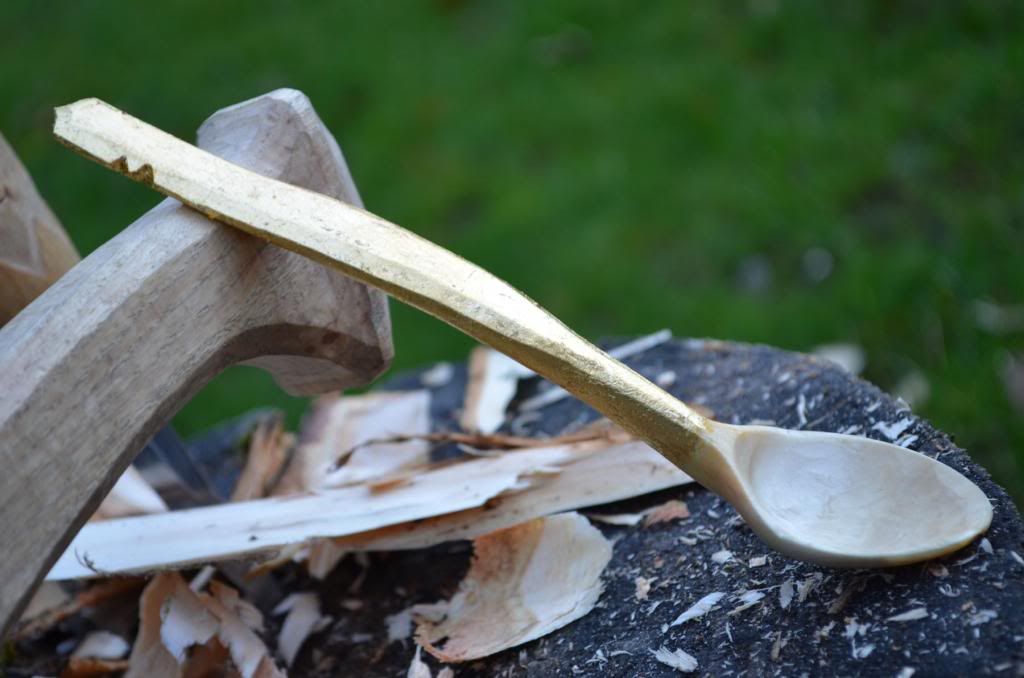
| I added a little 'up-sweep' at the end of the handle in the Swedish style |
I was happy for this spoon to be my first for 2013 as it was carved from a natural crook. If you are a spoon carver you may be thinking, "so what, I've carved a million crooks?" Well, I have tried a few and they've never really worked out satisfactorily - I've never quite managed to possition the bowl in the right place on the bend of the crook, resulting in a spoon that looks more like a golf putter, and an elongated bowl.
I wanted to have a go at painting this one, I really like yellow ochre type colours, but I didn't have any proper milk paint mixed so kind of bodged it with cheap acrylic paints mixed with wallnut oil (I finally went and bought some - my brother has been telling me for ages that I shouldn't be using olive oil, which I agree tends to smell a bit rancid after a while). It didn't quite work out - it was more bright orange than ochre so I wiped it off, leaving it stained the colour of baby pooh!
Seeing the mess I was making, my wife suggested that the first spoon of the year should be something special and why didn't I guild it, as I still had some gold leaf knocking around. So I did.
AN OBSERVATION: due to a shortage of logs and split wood, I have been carving skinny branches lately and I noticed how different these are to carve from wood that has been split out from a large trunk - a lot wetter and somehow more fibrous. Using this type of wood, they certainly need roughing out and then leaving to dry abit.
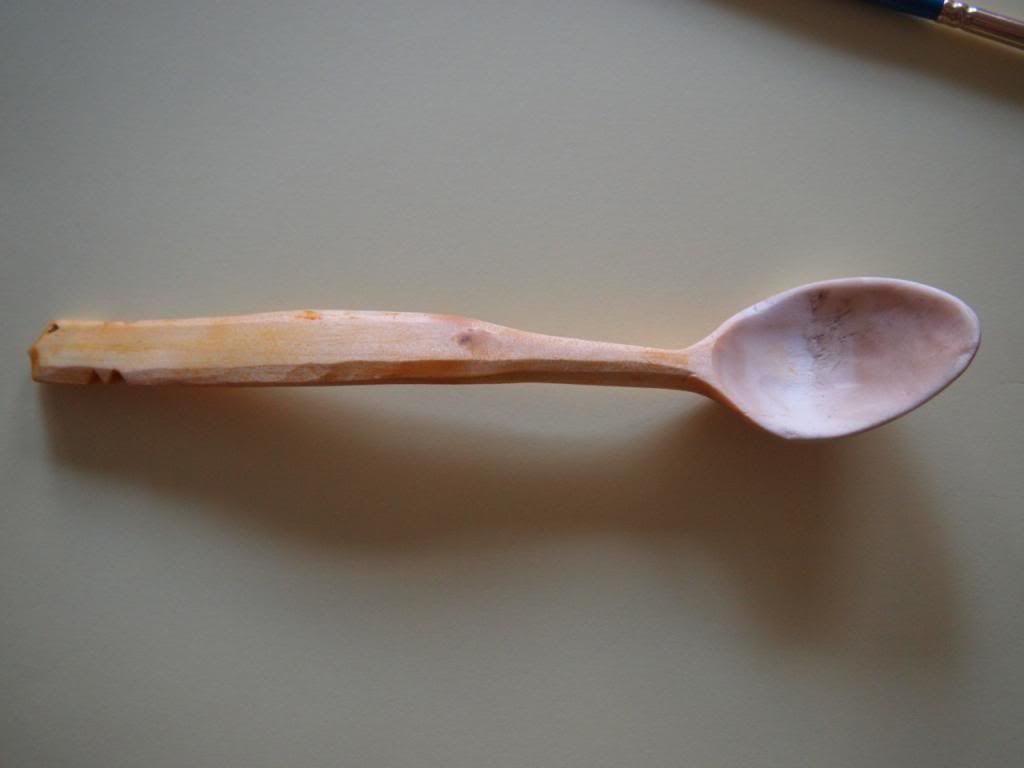
I also made a butter spreader toady - I'd split a lump of ash that I'd been given a few months ago, before ash dieback hit the news. What would previously have gone on my fire pile now suddenly seems more precious and I'll see if I can't get a couple of spoons out of it too, despite it being fairly seasoned.
 |
| Sorry for the poor quality of the picture - I've since enlisted the help of my daughter Chloe and her much nicer camera |
The design is one that I replicate a lot - it's not terribly practical but I like the way it looks. It's a little shorter that those I usually make, and therefore a little different in shape. See the one I have in Drew Langsner's 'Spreader Gallery' here:
http://countryworkshops.org/butterknife/Spreader_World/butterknives.html
It's number 66 - Drew is one of my heroes and I was very proud to be the first from the UK in the gallery.
Chloe's photography blog id here:
http://chloecloggsphotography.blogspot.co.uk/
No comments:
Post a Comment